
Landscaping
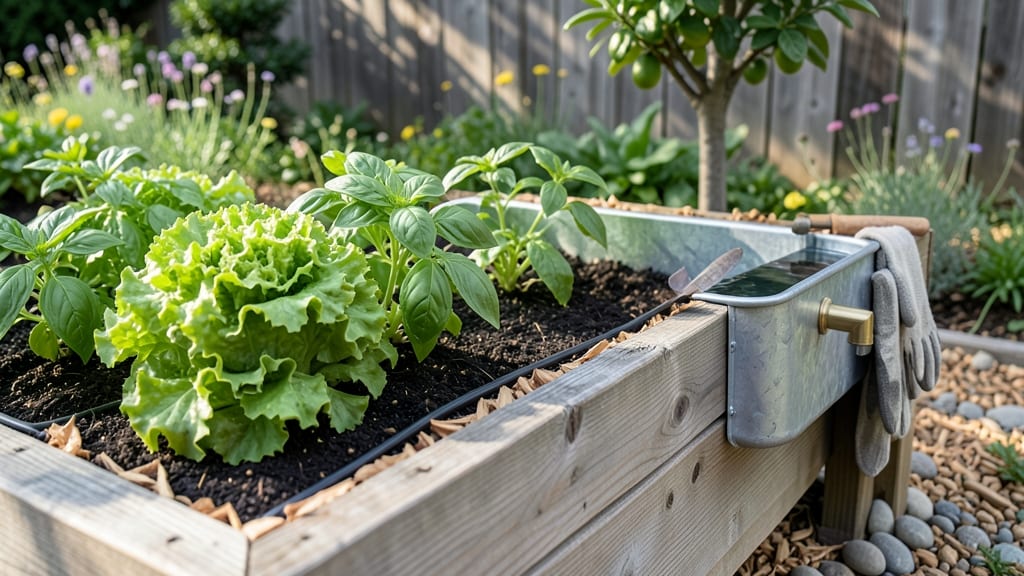
Turn old water troughs into self-watering raised garden beds to grow more with less effort and space.
Picture this: a sturdy, weathered trough now brimming with thriving herbs, leafy greens, or even compact veggies—all while using up to 30% less water than traditional beds. This clever repurposing isn’t just eco-friendly; it’s a game-changer for small yards, balconies, or even patios where space is tight.
Beyond saving water, these trough gardens stay moist longer, cut down on weeding, and let you grow plants that might otherwise struggle in regular soil. Plus, the rustic charm of repurposed metal or wood adds a unique, low-maintenance aesthetic to your outdoor space.
In this guide, I’ll walk you through how to prep your troughs, pick the best plants for their setup, and avoid common mistakes—so you can enjoy a bountiful harvest without the hassle.
How to convert water troughs into self-watering raised garden beds
Repurposing old water troughs into self-watering raised garden beds is a game-changer for small-space gardeners. These sturdy containers naturally retain moisture, reduce watering chores, and create a stylish vertical growing solution. The key lies in transforming their original purpose—holding livestock water—into a thriving ecosystem for herbs, veggies, or flowers.
Before diving into assembly, gather essential supplies: a clean, food-grade water trough (plastic or metal), landscape fabric, gravel for drainage, a wicking material like burlap or felt, potting mix, and your chosen plants.
The self-watering feature comes from creating a reservoir at the bottom, so water slowly feeds roots without waste. This method works especially well for drought-tolerant plants like basil, thyme, or Swiss chard.
I recommend starting with a plastic trough for its lightweight versatility, though metal troughs add rustic charm. Just ensure any metal is galvanized to prevent corrosion.
The beauty of this project lies in its adaptability—whether you're growing herbs on a balcony or tomatoes in a backyard, the principles remain the same.
Now let's get practical. Here's your step-by-step guide to transforming that trough into a thriving, self-sustaining garden:
Step-by-Step Conversion Guide
- Step 1: Clean & Prep Trough
Scrub thoroughly with soapy water and disinfect with a 10% bleach solution. Rinse completely and let dry in full sun for 24 hours to prevent mold. For metal troughs, sand any rust spots.
- Step 2: Create Drainage Layer
Add 2-3 inches of gravel or small rocks at the bottom. Cover with landscape fabric to prevent soil from clogging drainage holes (if your trough has them). This layer prevents root rot while allowing excess water to escape.
- Step 3: Install Wicking System
Place a layer of burlap or felt over the fabric. This acts as a wick, drawing moisture upward from the reservoir. For deeper troughs, add a second layer. This is the secret to self-watering success!
- Step 4: Build Soil Reservoir
Fill the bottom 1/3 of the trough with potting mix mixed with perlite (60/40 ratio). This lightweight mix prevents compaction. Leave space for plants—aim for 6-8 inches of growing soil above the reservoir.
- Step 5: Add Water Reservoir
Fill the bottom layer with water until it reaches just below the wicking material. For a 5-gallon trough, 1-2 gallons of water provides enough moisture for 2-3 weeks, depending on plant needs and climate.
- Step 6: Layer Top Soil
Add 4-6 inches of high-quality raised bed mix (compost, peat moss, and vermiculite). This top layer should be fluffy and nutrient-rich. Avoid garden soil—it compacts too easily.
- Step 7: Plant Strategically
Choose plants with similar water needs. Place moisture-loving plants (like lettuce) near the center where wicking is strongest, and drought-tolerant plants (like rosemary) toward the edges. Leave 6-12 inches between plants for airflow.
- Step 8: Mulch & Protect
Top with 1-2 inches of straw or wood chips to retain moisture and suppress weeds. If using outdoors, place your trough on feet or bricks to improve drainage and prevent soil spillage.
Once planted, your self-watering system will work magic. The wicking material slowly releases moisture to roots, keeping soil consistently damp without daily watering. For optimal performance, place your trough in partial shade to reduce evaporation—especially during hot afternoons.
This setup is perfect for herbs, leafy greens, and compact vegetables like bush beans or cherry tomatoes.
Pro tip: Add a solar-powered water pump if you want to automate refills. Simply place the pump's intake tube in a larger water source (like a rain barrel) and connect it to your trough's reservoir.
This turns your garden into a nearly hands-off system. Just remember to check the water level weekly during peak growing months.
For urban gardeners, consider adding vertical trellises inside the trough. Pole beans or cucumbers will climb upward, maximizing your growing space while keeping foliage off the ground. This also improves air circulation, reducing disease risk. The vertical design makes it easier to harvest and maintain, even in tight spaces.
Monitor your plants' health closely during the first few weeks. Yellowing leaves may indicate overwatering (check your wicking system), while wilting suggests the reservoir needs a top-up. With proper setup, your water trough garden will thrive with minimal effort—giving you more time to enjoy your homegrown harvests. Happy growing! 🌱
Best plants for water trough raised garden beds (with water needs matching)
Water trough raised garden beds are perfect for growing plants that thrive with consistent moisture but don't require constant attention. The key is matching your plants' water needs to the trough's natural moisture retention.
Since these containers hold water longer than traditional soil, I recommend drought-tolerant varieties alongside moisture-loving plants to create a balanced ecosystem.
For low-maintenance options, focus on herbs, leafy greens, and compact vegetables. These plants not only fit well in tight spaces but also grow beautifully in the unique shape of troughs.
My top picks include basil, lettuce, and cherry tomatoes, which all adapt well to the self-watering nature of troughs while requiring minimal extra care once established.
Drought-tolerant plants like rosemary, thyme, and Swiss chard are ideal for the edges of troughs where water may evaporate faster. Meanwhile, moisture-loving varieties such as mint, parsley, and bush beans thrive in the consistently damp soil at the center. This strategic placement ensures all your plants get the right conditions without overwatering.
| Plant Type | Sun Needs | Water Needs | Mature Size | Harvest Time |
|---|---|---|---|---|
| Basil | Full Sun (6+ hrs) | Medium (keep moist) | 1-2 ft tall | 60-75 days |
| Lettuce (Leaf) | Partial Sun (4-6 hrs) | High (keep damp) | 6-12 in tall | 30-50 days |
| Cherry Tomatoes | Full Sun (8+ hrs) | Medium (consistent) | 2-3 ft tall | 60-70 days |
| Swiss Chard | Full Sun (6+ hrs) | Low-Medium (drought-tolerant) | 1-2 ft tall | 50-60 days |
| Rosemary | Full Sun (6+ hrs) | Low (drought-resistant) | 2-4 ft tall | Harvest as needed |
| Mint | Partial Sun (4-6 hrs) | High (keep moist) | 1-2 ft tall | Harvest as needed |
When planting, I always start by placing moisture-loving plants near the center of the trough where water naturally collects. For example, mint and parsley thrive in this zone, while drought-tolerant herbs like rosemary and thyme go on the edges.
This arrangement mimics natural water flow and reduces the risk of overwatering delicate greens.
For compact vegetables, cherry tomatoes and bush beans are excellent choices. They fit well in the curved shape of troughs and produce abundant harvests with minimal space. Just ensure they get enough sunlight—at least 6 hours daily—to prevent leggy growth.
I also recommend using cage supports for tomatoes to keep them contained within the trough's shape.
Finally, don't forget to monitor your trough's moisture levels, especially during hot months. A simple trick I use is placing a moisture meter in the center to track water retention.
This helps me adjust watering schedules and ensures all plants—whether drought-tolerant or moisture-loving—thrive in their unique microclimates within the trough.