
Vegetables
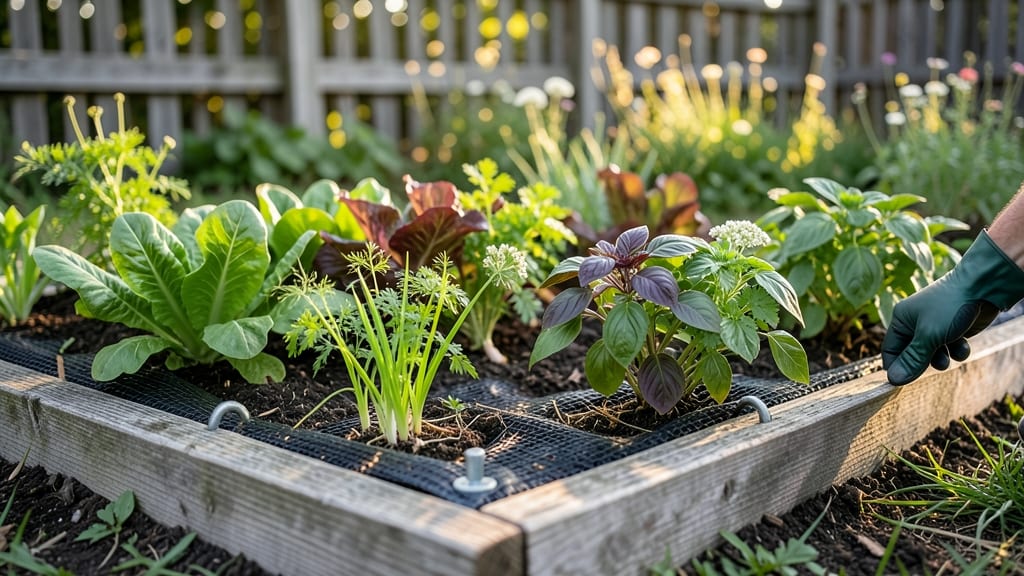
A weed guard for gardens is the unsung hero of low-maintenance gardening—saving you time, preserving moisture, and keeping your soil healthy without chemicals.
Tired of spending hours pulling weeds that keep coming back? A weed guard for gardens could be your secret weapon—blocking unwanted plants while protecting your soil’s health and your plants’ growth.
Whether you’re using landscape fabric, repurposed cardboard, or store-bought mulch mats, these barriers work by smothering weeds before they sprout, all while letting water and air reach your plants. No more bending over or wrestling with stubborn roots—just cleaner beds with less effort.
In this guide, I’ll walk you through the best materials, step-by-step installation tips, and when to use them for maximum results—so you can spend more time enjoying your garden and less time fighting it.
How weed guards work: types of fabric barriers for effective weed control
A weed guard acts like an invisible shield for your garden, blocking sunlight and preventing weed seeds from sprouting while allowing water and air to reach your plants. Unlike chemical herbicides, these fabric barriers work by physically smothering weeds without harming your soil’s beneficial microorganisms.
The right material can save you hours of weeding each season while improving moisture retention and reducing competition for nutrients.
Not all weed guards are created equal—some degrade quickly under UV light, while others suffocate weeds but block too much airflow. The best choice depends on your garden’s specific needs, whether you prioritize eco-friendliness, durability, or permeability.
Let’s break down the most effective fabric-based solutions and their unique advantages.
| Material | Weed Blocking Effectiveness | Durability (Years) | Water Permeability | Eco-Friendly? | Best For |
|---|---|---|---|---|---|
| Landscape Fabric | 90-95% | 1-3 years | High (allows water) | ✅ (Biodegradable options) | Vegetable beds, pathways |
| Cardboard | 85-90% | 6-12 months | Moderate (degrades) | ✅ (100% biodegradable) | Short-term projects, mulch base |
| Mulch Mats | 95-98% | 2-5 years | Very High (breathable) | ✅ (Recyclable) | Flower beds, shrubs |
| Geotextile Fabric | 98-100% | 3-7 years | High (UV-stabilized) | ⚠️ (Petroleum-based) | High-traffic areas, erosion control |
Landscape fabric is the most popular choice for gardeners because it strikes a balance between weed suppression and water permeability. Made from polypropylene or polyester, it blocks 90-95% of weed seeds while allowing air and water to penetrate. Look for UV-stabilized versions to extend its lifespan from 1-3 years. This makes it ideal for vegetable gardens where you want to minimize soil disturbance.
For eco-conscious gardeners, cardboard is a fantastic short-term solution. When laid flat and moistened, it breaks down completely within 6-12 months, enriching the soil with organic matter. However, it’s best used under mulch or as a temporary barrier before planting.
I’ve used cardboard in my raised beds before transplanting seedlings—it smothers weeds while adding nutrients back to the soil.
Mulch mats are my top recommendation for flower beds and ornamental gardens. These breathable, woven materials block nearly all weed seeds while allowing water and air to flow freely. Unlike plastic fabrics, mulch mats won’t suffocate your plants’ roots. They’re also more durable, lasting 2-5 years, and come in attractive designs that blend with your garden aesthetic.
If you’re dealing with high-weed areas or need long-term suppression, geotextile fabric is the heavyweight champion. It blocks 98-100% of weeds and resists tearing, but it’s not the most eco-friendly option due to its petroleum-based composition.
Use this in pathways or under gravel where you won’t be planting—it’s perfect for permanent weed control without chemicals.
One material I’ve found surprisingly effective is burlap, especially for seed-starting trays. While not as durable as synthetic fabrics, it biodegrades completely and provides excellent weed suppression for short-term projects. Just be sure to remove it before planting to avoid smothering young seedlings.
When choosing a weed guard, consider your garden’s specific challenges. For example, in container gardens, lightweight landscape fabric works best, while vegetable rows benefit from mulch mats that allow easy access for harvesting. Always overlap edges by at least 6 inches to prevent weeds from creeping through gaps.
Remember, no weed guard lasts forever—even the most durable materials will degrade under constant sunlight. To extend their life, cover them with 2-3 inches of mulch or plant directly
Step-by-step guide: installing weed guards in your garden for maximum effectiveness
Installing a weed guard for gardens is one of the easiest ways to reclaim control over your garden beds without resorting to chemicals. Whether you're using landscape fabric, cardboard mulch, or commercial weed barriers, proper installation ensures long-lasting weed suppression.
The key lies in preparation, precise cutting, and secure placement—all of which I’ll walk you through step by step.
Before you begin, gather your materials: a weed guard fabric, sharp scissors or a utility knife, landscape staples or rocks for securing edges, and gloves for protection. Clear the area of existing weeds and debris, then smooth the soil surface to create an even base.
Uneven soil can lead to gaps where weeds might sneak through, so take your time here.
🌱 Step-by-Step Installation Guide
-
1Measure and Cut: Lay your weed guard fabric over the garden bed and mark the edges with stakes. Use a ruler and pencil to outline the shape, then cut along the lines with sharp scissors. For curves, use a utility knife for precision.
-
2Overlap Seams: If using multiple pieces, overlap them by at least 6 inches to prevent weeds from growing between seams. Secure overlaps with landscape staples or heavy rocks to keep them in place.
-
3Secure Edges: Use landscape staples or U-shaped pins to anchor the fabric’s edges to the soil. For raised beds, fold the edges inward and staple them down. This prevents wind from lifting the fabric and creating gaps.
-
4Create Planting Holes: Use a gardening knife or scissors to cut X-shaped slits in the fabric where you’ll plant. This allows roots to grow while keeping weeds out. Space slits according to your plant’s mature size.
-
5Add Mulch (Optional): Top the fabric with 2-3 inches of organic mulch (like straw or wood chips) to retain moisture and further suppress weeds. Avoid thick mulch layers, as they can smother your plants over time.
-
6Monitor and Maintain: Check the fabric periodically for tears or gaps, especially after heavy rain. Repair any damage immediately to maintain effectiveness. Avoid walking on the fabric to prevent rips.
One of the most common mistakes is exposing the weed guard to direct sunlight for extended periods, which can degrade the material over time. If you’re using a plastic-based fabric, consider covering it with mulch or shade cloth to prolong its lifespan.
For cardboard weed guards, replace them after one season, as they break down quickly in moisture.
Pro tip: If you’re planting shallow-rooted plants like lettuce or radishes, you can skip the X-slits and simply cut small holes in the fabric. For deeper-rooted plants like tomatoes or carrots, larger slits or even removing the fabric around the plant’s base works best.
Always tailor the approach to your specific plants for optimal results.
With these steps, your weed guard for gardens will create a barrier that saves you time, reduces water evaporation, and keeps your soil healthy by blocking weeds at their source. Once installed, you’ll spend less time weeding and more time enjoying your garden’s bounty.