
Tools
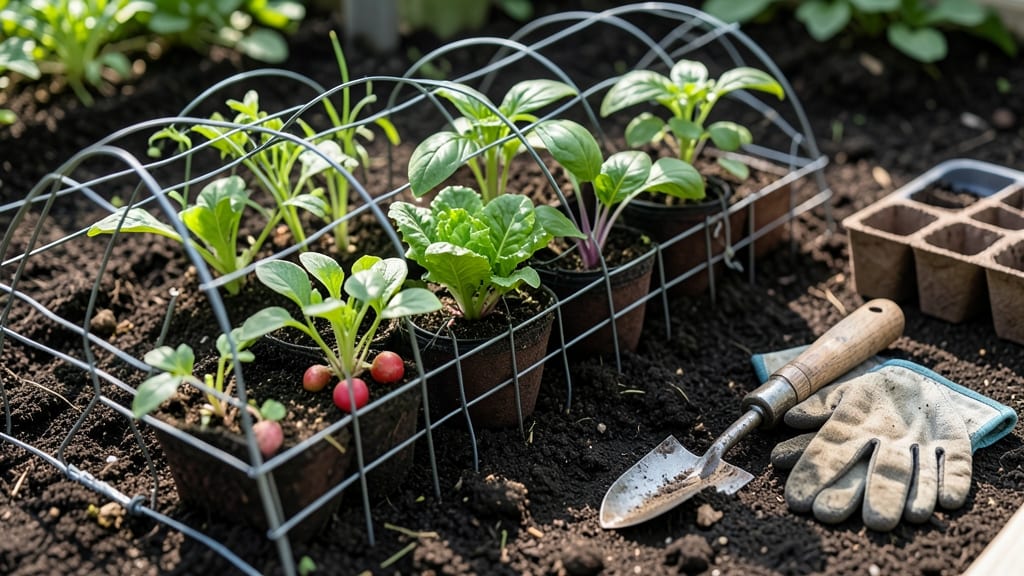
A chicken wire vegetable garden fence is the secret weapon for protecting your 🥦 from rabbits, deer, and even determined squirrels—without breaking the bank or ruining your yard’s look.
Struggling with relentless pests ruining your vegetable garden? Chicken wire might be the simplest, most budget-friendly solution to protect your raised beds without sacrificing aesthetics or functionality.
This lightweight, flexible fencing is easy to install, reusable, and works for everything from temporary trellises to permanent raised-bed barriers. Unlike rigid fences, it bends to fit awkward spaces and won’t rot in the rain.
Below, I’ll show you how to build a durable, pest-proof setup in 3 simple steps, plus creative ways to repurpose leftover wire—because every gardener knows good materials go to waste.
How to build a chicken wire vegetable garden fence for complete pest protection
If you've ever lost an entire crop to hungry rabbits, deer, or relentless squirrels, you know how devastating garden pests can be. A chicken wire vegetable garden fence offers an affordable, temporary solution that keeps critters out while letting sunlight and air flow freely.
Unlike rigid fences, chicken wire bends with your garden's shape and can be customized for raised beds, individual plants, or even trellis supports.
What makes chicken wire ideal? It's lightweight, flexible, and budget-friendly—typically costing just $10-$20 for a 25-foot roll. Plus, it’s easy to install without heavy tools. For maximum effectiveness, we’ll focus on a 3-foot-tall barrier, the perfect height to deter most ground-dwelling pests while remaining unobtrusive in your landscape.
Let’s get started with the essential materials and a foolproof installation process.
📌 Step-by-Step Guide to Building Your Chicken Wire Fence
-
1
Measure and Mark Your Garden
Use a tape measure to determine the perimeter of your raised bed or garden area. Mark the outline with wooden stakes and string for precision. For a 3-foot fence, account for the wire’s height (typically 48 inches wide) and overlap sections by 6 inches for stability.
-
2
Gather Your Materials
You’ll need:
- 1 roll 19-gauge chicken wire (48" wide x 100' long)
- Galvanized U-shaped staples or fence staples
- Wooden T-posts or bamboo stakes (4-foot)
- Heavy-duty zip ties or wire twist ties
- Gloves and wire cutters
-
3
Install Support Posts
Drive T-posts into the ground every 3-4 feet along your marked perimeter. For added stability, bury them at least 12 inches deep. If using bamboo stakes, secure them with zip ties to prevent shifting.
-
4
Attach the Chicken Wire
Unroll the wire and secure the bottom edge to the posts using fence staples. Stretch it taut and attach the top edge, overlapping sections by 6 inches where needed. Use zip ties to reinforce connections between posts.
-
5
Add a Top Bend for Extra Protection
For deer or determined pests, bend the top of the wire inward at a 45-degree angle for 6 inches. This creates an overhang that deters climbing. Secure the bent section with additional zip ties to the posts.
-
6
Test for Gaps and Reinforce
Walk around the fence and check for gaps larger than 1 inch. Use additional staples or wire to close any openings. For raised beds, you can also bury the bottom 6 inches of wire 2 inches deep to block burrowing pests like moles.
-
7
Camouflage for Aesthetics
To blend the fence into your garden, weave climbing plants like morning glories or sweet peas along the top. Alternatively, paint the wire with non-toxic spray paint to match your garden’s color scheme.
For raised beds, consider adding a second layer of wire on the inside, angled outward at the top. This creates a "V" shape that confuses pests and makes it nearly impossible for them to jump over.
I’ve used this method with my tomato plants, and it’s kept squirrels out entirely during harvest season!
One common mistake is using cheap, flimsy chicken wire. Opt for 19-gauge or heavier to prevent sagging or tearing. If your garden is in a windy area, secure the wire with sandbags or cinder blocks at the base to keep it upright.
For long-term use, replace the wire every 2-3 years as it can rust or weaken over time.
Pro tip: If you’re protecting young seedlings, create a mini cage by bending the wire into a cylinder and securing it around individual plants. This works wonders for basil or lettuce, which are prime targets for slugs and snails.
Just remember to remove the cage once the plants are established to avoid restricting growth.
With your chicken wire vegetable garden fence in place, you’ll finally have peace of mind knowing your hard work won’t be devoured overnight. Plus, the versatility of chicken wire means you can repurpose it for trellises, plant supports, or even a DIY compost bin when the growing season ends.
Happy gardening!
Chicken wire vs. other garden fencing: pros, cons, and best use cases
When protecting your vegetable garden from pests like rabbits, squirrels, or even curious dogs, chicken wire is often the first option gardeners consider. It’s affordable, easy to find, and surprisingly effective for short-term projects.
But is it the best choice for your specific needs? Let’s compare chicken wire with other common garden fencing options to help you decide what works best for your raised beds or in-ground plots.
Chicken wire is lightweight, flexible, and perfect for quick setups—ideal for protecting young seedlings or small garden areas. However, its small diamond openings (about 1-inch) make it less effective against determined pests like deer or larger rodents.
For long-term projects or areas with aggressive wildlife, you might need something more robust.
Before making a decision, consider factors like durability, cost, and ease of installation. Hardware cloth, for example, offers tighter spacing (½-inch) and better durability, while wooden fences provide a more permanent, aesthetic solution.
Each option has trade-offs, so let’s break down the pros and cons to help you choose the best fit for your garden.
- $10-$20 for 100 sqft
- Lightweight, easy to bend
- Good for short-term projects
- Pest-resistant against small animals
- ½-inch openings block pests
- More durable than chicken wire
- $20-$40 for 100 sqft
- Longer lifespan
- Customizable mesh sizes
- Stronger than chicken wire
- $25-$50 for 100 sqft
- Good for trellises
- Permanent solution
- Aesthetic appeal
- Blocks all pests
- $50-$150 for 100 sqft
- 1-inch gaps allow small pests
- Not durable for long-term use
- Can rust over time
- Less secure for larger animals
- Heavier and harder to install
- Can rust if not galvanized
- $20-$40 more expensive
- Less flexible than chicken wire
- More expensive
- Requires tools to install
- Can be bulky
- Limited aesthetic appeal
- Expensive upfront cost
- Requires maintenance
- Not flexible for temporary use
- Can rot over time
For short-term projects or protecting young plants, chicken wire is a fantastic choice. Its affordability and ease of use make it ideal for seedling protection or creating temporary barriers. However, if you’re dealing with larger pests like deer or raccoons, hardware cloth or wire mesh will offer better protection.
These options provide tighter spacing and greater durability, ensuring your vegetable garden stays safe for the long haul.
Wooden fences are another popular option, especially for gardeners who prioritize aesthetics or need a permanent solution. While they offer excellent pest protection and can enhance your garden’s appearance, they require more upfront investment and maintenance.
If you’re looking for a balance between functionality and cost, wire mesh is a great middle ground—it’s stronger than chicken wire and more flexible than wooden fences.
Ultimately, the best fencing for your garden depends on your specific needs. If you’re working with a budget and need a quick solution, chicken wire is hard to beat. For long-term projects or areas with aggressive pests, hardware cloth or wire mesh will provide better results.
And if you want a blend of functionality and beauty, a wooden fence might be worth the investment.
No matter which option you choose, remember that proper installation is key. Bury the fence at least 6 inches deep to prevent digging pests from slipping underneath, and secure it tightly to avoid gaps. With the right fencing, your vegetable garden will thrive without unwanted visitors ruining your hard work.