
Shrubs
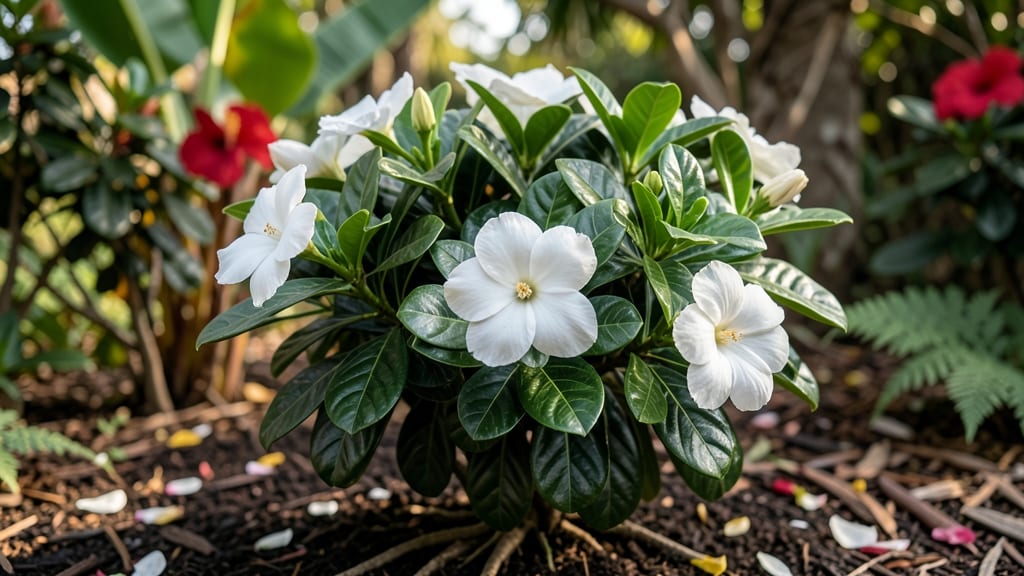
A full grown gardenia 🌸 can transform your yard into a fragrant paradise—but only if you prune it the right way. If your blooms are sparse or the scent has faded, you’re likely missing a few key steps that keep these shrubs thriving year-round.
Most gardeners prune at the wrong time, accidentally stunting new growth or even killing the plant’s ability to produce those signature white flowers. The secret lies in timing, technique, and knowing which branches to trim (and which to leave alone).
In this guide, I’ll walk you through the exact pruning schedule for your USDA Zone 6a gardenia, from when to snip in spring to how to revive a leggy shrub. You’ll also learn how to fix common mistakes—like over-pruning—that leave your gardenia looking bare and scentless.
By the end, you’ll have a gardenia that blooms abundantly, stays fragrant, and grows stronger with each season—no guesswork required.
When and how to prune a full grown gardenia for maximum blooms
Pruning your full grown gardenia isn’t just about shaping its lush foliage—it’s the key to unlocking year-round fragrance and vibrant blooms. Gardenias flower on old wood, meaning last year’s growth produces this year’s flowers.
If you prune at the wrong time or too aggressively, you risk stripping away next season’s blooms entirely. The secret lies in timing and precision, focusing on dead or weak branches while preserving the framework that holds your plant’s future flowers.
Most gardeners make the mistake of pruning in late winter or early spring, but this is actually the worst time for gardenias. Instead, the ideal pruning window is right after flowering, typically in late summer or early fall.
This timing allows your gardenia to recover before winter and sets the stage for a prolonged bloom season the following year. Let’s dive into the step-by-step method that will transform your gardenia from a sparse bloomer to a fragrance-filled showstopper.
Step-by-Step Pruning Guide for Full Grown Gardenia
- Step 1: Choose the Right Time Prune immediately after your gardenia finishes blooming, ideally in late August to early September.
- Step 2: Gather Your Tools Use clean, sharp pruners (sterilized with rubbing alcohol) and bypass pruners for larger branches. Avoid dull tools that tear bark.
-
Step 3: Identify Branches to Remove
Cut out:
- Dead or dying branches (no green leaves, brittle texture)
- Crossing or rubbing branches (competing for sunlight/nutrients)
- Overly long, leggy growth (prune back by 1/3 to encourage bushiness)
- Step 4: Make Clean Cuts Cut just above a leaf node (the bump where leaves grow) at a 45-degree angle. Avoid leaving stubs—this invites disease.
- Step 5: Thin Out the Center Remove 20-30% of the oldest, innermost branches to improve airflow and sunlight penetration. This prevents fungal diseases and encourages new growth.
- Step 6: Shape Gently Lightly shape the outer edges to maintain a rounded, natural form. Avoid aggressive pruning—gardenias respond better to gradual shaping.
- Step 7: Clean Up Remove all pruned branches from the area and sterilize your tools with a 10% bleach solution to prevent spreading disease.
- Step 8: Fertilize and Water Apply a balanced, acidic fertilizer (10-10-10) and water deeply to help the gardenia recover. Mulch around the base to retain moisture.
One of the biggest mistakes gardeners make is over-pruning in an attempt to encourage more blooms. Gardenias are sensitive to aggressive cuts, and removing more than 30% of the plant’s foliage at once can shock it into dropping buds or even going dormant.
Instead, focus on selective pruning—targeting only the dead, diseased, or overcrowded branches while leaving the healthy framework intact.
Pay special attention to the branch structure of your gardenia. Healthy branches should have a thick, woody base with green leaves and buds. If you see thin, spindly growth with no leaves, these are water sprouts that steal energy from flowering.
Prune these back to a stronger branch or the main stem. This redirection of energy will boost bloom production next season.
After pruning, your gardenia will need extra care to recover and rebloom. Increase watering frequency to every 2-3 days for the first 2 weeks post-pruning, and avoid fertilizing until new growth appears.
Gardenias thrive in acidic soil (pH 5.0-6.5), so if your soil is alkaline, amend it with peat moss or sulfur to create the ideal environment for fragrance-heavy blooms.
For container-grown gardenias, pruning is even more critical because root space is limited. Prune 10-15% less aggressively than in-ground plants and repot every 2-3 years to refresh the soil.
Use a well-draining mix with perlite or orchid bark to prevent root rot, which can strangle your plant’s ability to bloom.
If your gardenia hasn’t bloomed well in the past, it might be root-bound or nutrient-deficient. After pruning, give it a light feeding with an azalea fertilizer (high in iron and micronutrients) to support new growth.
Place your gardenia in a bright, indirect light spot—morning sun with afternoon shade is ideal—to encourage strong, healthy stems that will produce more buds.
Remember, the goal of pruning isn’t just to shape your gardenia—it’s to stimulate fragrance. By following these steps, you’ll create an environment where your gardenia can thrive, rebloom, and fill your garden with its signature intoxicating
Common pruning mistakes that kill gardenia fragrance (and how to fix them)
Your full grown gardenia’s fragrance depends heavily on proper pruning. Unfortunately, many gardeners accidentally stifle blooms by making common mistakes. Over-pruning in one season can leave your plant stressed and sparse, while cutting at the wrong time can delay—or even prevent—those signature white, fragrant blooms.
Even well-intentioned gardeners often deadhead incorrectly, thinking they’re helping when they’re actually signaling the plant to pause flowering. The key is understanding when to prune, how much to remove, and which branches to prioritize for maximum fragrance production.
⚠️ WARNING: These 3 Mistakes Are Crushing Your Gardenia’s Scent
✂️ Pruning at the Wrong Time
Cutting back your full grown gardenia in late fall or winter (when buds form) can eliminate next year’s blooms. Gardenias set flower buds on new wood, so pruning after September 1st risks removing potential blooms.
🌱 Over-Pruning for "Shape"
Removing more than 1/3 of the plant in one session stresses gardenias. This leads to fewer blooms and weaker fragrance. Thin selectively—never shear—to maintain airflow and light penetration.
💀 Deadheading Wrong
Snipping spent blooms at the stem (not the node) tricks the plant into thinking it’s still flowering. Always cut just above a leaf node to encourage new growth and future blooms.
To revive your gardenia’s scent, start by pruning in late winter or early spring (February-March) when new growth begins. Focus on removing dead, crossing, or weak branches first—never more than 25% of the plant at once. Use sterilized pruners to avoid disease spread.
If your gardenia’s fragrance has faded, organic fertilizer adjustments can help. Switch to an acid-loving plant fertilizer (like cottonseed meal) in early spring and mid-summer. Avoid high-nitrogen feeds—they promote foliage over flowers. Pair this with mulch around the base to retain moisture and acidify the soil.
For a year-round fragrance boost, prune lightly after each flowering cycle (every 3-4 months). This keeps your gardenia compact and blooming instead of overgrown and sparse. Pair pruning with morning watering (1-2 gallons per week) to reduce stress on the plant.
With these fixes, your full grown gardenia can regain its signature sweet scent and bloom heavily year-round. The key is patience—gardenia recovery takes 2-3 growing seasons of proper care. 🌸