
Picking
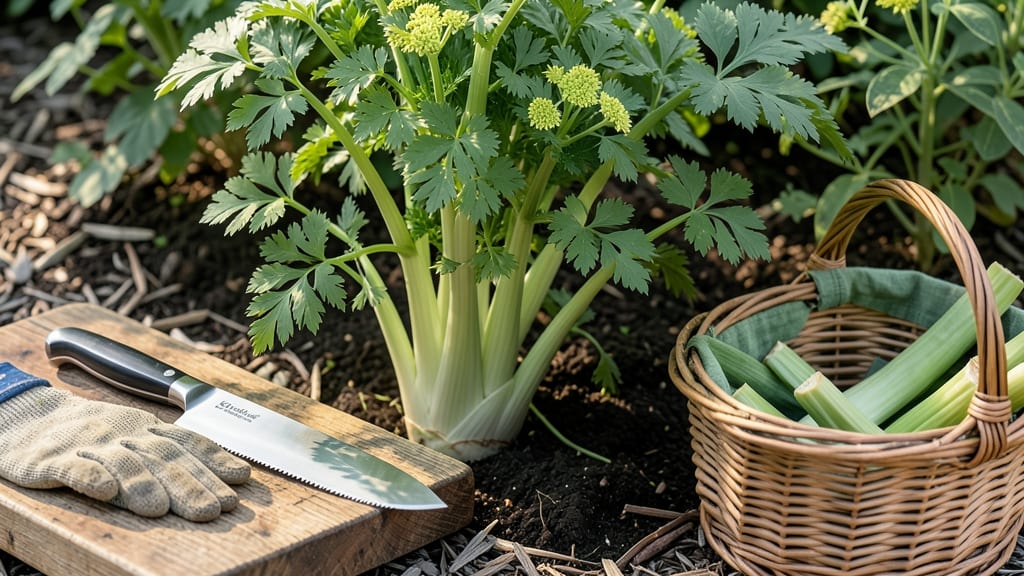
Harvesting garden celery at the right time means the difference between a crisp, sweet 🥬 feast and a tough, bitter disappointment.
If your celery stalks are splitting at the base, you’re not dealing with a problem—you’re witnessing nature’s way of telling you it’s time to pick. But knowing exactly when to harvest for maximum flavor and yield can feel tricky, especially when you’re balancing size, color, and that perfect crunch.
Celery thrives in USDA Zone 6a when planted in early spring or late summer, and the June-July window is prime for a flavor-packed harvest. Too early, and the stalks are still tough; too late, and they turn woody.
I’ll show you the 5 clear signs your celery is ready, plus how to cut it without sacrificing future growth.
Ready to bring in your harvest? You’ll learn step-by-step how to pick celery for peak flavor, store it for freshness, and even encourage regrowth for a second round of sweet, crisp stalks.


When to harvest garden celery: 5 clear signs your stalks are ready
Harvesting garden celery at the right moment transforms your effort into crisp, sweet stalks packed with flavor. Too early, and you’ll get tough, bitter stems. Too late, and the texture turns woody, losing that fresh garden appeal.
The key lies in recognizing 5 clear visual cues that signal peak ripeness, combined with understanding your local growing season. Let’s break down what to watch for in your garden.
Celery thrives in cooler weather, making timing critical based on your USDA zone. In zones 6-8, spring plantings typically reach harvest by June-July, while fall plantings mature by October-November.
If you’re in warmer zones (9-11), you can extend harvests into late fall or even winter with proper protection. Always align your harvest with these seasonal windows to avoid missing the sweet spot.
- 1 Stalk Height: 12-15 inches – Celery is ready when stalks reach 12-15 inches tall, forming a tight cluster. Measure from the base to ensure they’re uniformly thick.
- 2 Dark Green, Crisp Leaves – Healthy celery leaves should be deep green and crisp to the touch. Yellowing or wilting indicates overmaturity or stress.
- 3 Base Splitting or Tight Clustering – A slight split at the base or tightly packed stalks means the plant is directing energy to seed production, signaling peak flavor.
- 4 Outer Leaves Yellowing Slightly – The outer leaves may yellow at the edges while inner stalks stay vibrant. This is normal and indicates maturity, not disease.
- 5 Flavor Test: Sweet and Crisp – Snip a small stalk and taste it. At peak ripeness, celery should be sweet, crisp, and juicy. If it’s bitter or fibrous, it’s past its prime.
Regional adjustments are key to timing your harvest. In cooler climates (zones 1-5), focus on early spring harvests (April-May) or late summer plantings for fall harvests (September-October). Warmer zones (7-11) can extend harvests into winter with row covers or enjoy multiple plantings throughout the year.
Always monitor your plants weekly for these 5 readiness signs to avoid missing the window.
Don’t overlook the flavor test—it’s the ultimate indicator. If your celery tastes bland or overly bitter, it’s either underripe or overripe. Aim for that sweet, crisp balance that makes homegrown celery worth the effort. Pro tip: Harvest in the morning when flavors are most concentrated and stalks are firmest.
Once you’ve confirmed readiness, act quickly. Celery’s peak flavor window is narrow—often just 3-5 days between perfect ripeness and overmaturity. Use sharp scissors or a knife to cut stalks at the base, leaving about 1 inch of stem to encourage regrowth.
This method lets you enjoy multiple harvests from a single plant over several weeks.
For continuous harvests, consider succession planting every 2-3 weeks during your growing season. This ensures a steady supply of fresh celery while you master the art of spotting those 5 readiness cues.
Over time, you’ll develop an instinct for when your garden celery is begging to be picked—no more guesswork, just crisp perfection.
Remember, celery’s texture and sweetness are at their peak when these signs align. Ignore them, and you risk ending up with tough, woody stalks that even the best recipes can’t save. Pay attention to your plants, and they’ll reward you with the best-tasting garden celery you’ve ever grown.
🥬✂️🌱
How to harvest celery without damaging future growth: step-by-step guide
Harvesting garden celery at the right time ensures maximum flavor and encourages future regrowth. The key is to use the proper cutting techniques while preserving the plant’s ability to produce more stalks. Unlike many vegetables, celery can regrow if you leave the base intact and handle it gently.
I’ve learned that even a small mistake—like cutting too low or using dull tools—can stunt future harvests, so let’s get this right.
Before you begin, gather your harvesting tools: a sharp pruning shear or clean kitchen knife, a bucket of cool water, and a small container for trimming scraps. Avoid pulling stalks—this can uproot the entire plant.
Instead, focus on making precise cuts just above the soil line to leave the root system undisturbed. This method works for both the main stalks and any side shoots that emerge later.
Select stalks that are 12-15 inches tall, firm, and tightly clustered. Avoid harvesting stalks that are hollow or woody—these won’t regrow well.
A dull knife crushes stalks, inviting rot. Sterilize blades with rubbing alcohol to prevent disease spread between cuts.
Make a 45-degree angle cut just above the soil line. Leave 1-2 inches of stem to protect the root crown.
Remove outer leaves and any yellowed or damaged sections. Rinse stalks in cool water to remove dirt and debris.
Place harvested celery in a plastic bag with a damp paper towel. Keep it in the fridge for up to 2 weeks, and return to the garden to encourage new shoots.
After harvesting, don’t toss the scraps! Place the trimmed stalks in a shallow dish of water with the cut ends submerged. Keep them in a bright, indirect light spot (like an east-facing window) and watch for new side shoots to emerge in 2-3 weeks.
This trick works best with varieties like Utah Improved or Golden Self-Blanching, which are known for their regrowth potential.
To maximize future yields, fertilize the soil lightly with a balanced 5-10-10 mix after harvesting. Focus on the root zone and water deeply to encourage new growth. Avoid over-fertilizing, as this can lead to leafy growth at the expense of stalks.
Instead, aim for a moderate nitrogen approach to support both regrowth and future harvests.
If your celery plant produces side shoots, harvest these individually by cutting them at the base with the same 45-degree angle technique. These smaller stalks often mature faster than the main plant, giving you a continuous harvest throughout the growing season.
Just remember: never remove more than one-third of the plant at a time to avoid stressing the root system.
With the right techniques, your celery plant can reward you with multiple harvests over several months. The key is patience and precision—every cut should feel intentional, not rushed. Soon, you’ll have a steady supply of crisp, homegrown celery without sacrificing future growth. Happy harvesting! 🥬✂️