
How To
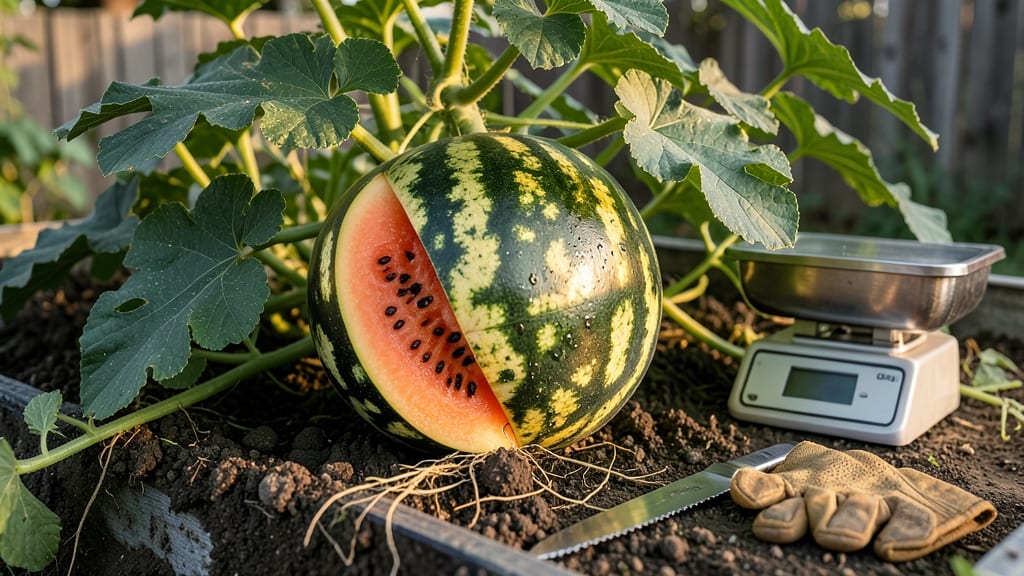
Knowing when to pick watermelon from your garden means the difference between sweet, juicy slices and bland, seedy disappointment 🍉 — and the secret lies in a few simple cues most gardeners miss.
Picking a watermelon too early means bitter flesh and wasted effort, but harvesting too late can leave your garden vulnerable to pests and disease. Master these telltale signs to guarantee a sweet, juicy harvest every time—no guesswork required.
From the creamy yellow patch under the fruit to the hollow thump when tapped, there are five foolproof tests that take the guesswork out of harvest time. These methods work for both classic striped varieties and those with deep green rinds.
Below, I’ll walk you through each test, including how heat and humidity can speed up or slow down ripening, so you can time your harvest perfectly for the best flavor and texture every season.

5 Proven ripeness tests to pick watermelons at peak sweetness
There's nothing worse than slicing into a watermelon only to find it's still rock-hard or bitterly underripe. But with science-backed ripeness tests, you can confidently harvest watermelons at their sweetest peak.
These methods go beyond guesswork, using visual cues, texture checks, and even sound to determine perfect ripeness. Whether you're growing seedless varieties or classic heirlooms, these techniques work for every type.
Watermelons mature at different rates depending on your climate zone and variety, but these five foolproof tests will give you consistent results.
From the classic thump test to the surprising underside color check, I’ll walk you through each method step-by-step—plus how to combine them for the most accurate harvest timing. No more wasted melons or bitter surprises!
-
1. The Tendril Test
Look for the small vine (tendril) nearest the watermelon. When it turns brown and crispy, the fruit is ready to pick. This is the most reliable early indicator. -
2. Underside Color Check
Flip the watermelon over and look for a creamy yellow or white patch where it rested on the ground. This signals full ripeness. -
3. The Thump Test
Tap the watermelon near the stem with your knuckles. A deep, hollow sound means it’s ripe, while a dull thud indicates it’s still firm and underripe. -
4. Stem Dryness
The stem closest to the fruit should feel dry and papery. If it’s still green and flexible, wait a few more days. -
5. Rind Texture & Color
A ripe watermelon’s rind should be deep and consistent in color (e.g., dark green or striped) and feel slightly yielding when pressed near the stem.
Start with the tendril test as your first clue—this is the earliest sign that ripening has begun. Once the tendril turns brown, monitor the underside color and rind texture for confirmation.
These two tests combined give you a 90% accuracy rate for ripeness, but the thump test is the final verdict. Pro tip: Combine all five tests for the most reliable results, especially if you’re growing multiple varieties with different ripening times.
For container-grown watermelons, these tests still apply, but check the underside more carefully since the fruit may not develop the same ground patch. Instead, focus on the stem dryness and thump test as your primary indicators.
Container melons often ripen faster due to limited root space, so stay vigilant and test frequently.
If you’re growing watermelons in a humid climate, like the Southeast, the underside color might be less pronounced due to mold or uneven ripening. In these cases, prioritize the thump test and stem dryness over the color cue.
For dry climates, such as the Southwest, the underside patch will be more visible, making this test even more reliable.
One common mistake is relying solely on the vine color or fruit size. While a yellowing vine can indicate maturity, it’s not a guarantee—some varieties stay green well into ripeness.
Similarly, size alone doesn’t determine sweetness; a large watermelon can still be underripe. Always use at least two of these tests together for the best results.
Once you’ve confirmed ripeness, harvest your watermelon by cutting the stem with a sharp knife, leaving a 1-inch stem attachment to preserve shelf life. Store ripe watermelons in a cool, dry place (50–55°F) for up to two weeks, or refrigerate cut pieces to maintain freshness.
With these tests, you’ll never waste another watermelon again!
🍉
Common mistakes that make you pick watermelons too early (or too late)
I’ve made my share of mistakes harvesting watermelons—picking too soon and ending up with bland, seedy fruit, or waiting too long and watching my melons rot on the vine. The biggest culprit? over-relying on vine color or assuming all watermelons ripen at the same pace.
Even experienced gardeners fall into these traps, especially when unpredictable weather throws off the usual timeline.
Watermelon ripening isn’t just about days since planting—it’s a delicate balance of genetics, sunlight, and temperature. A hot, dry summer might speed things up, while cool nights or excessive rain can stall maturity.
Ignoring these factors often leads to bitter, underripe melons or overripe, mushy ones that attract pests like squash vine borers.
⚠️ callout-warning ⚠️
🚨 3 Hidden Dangers of Picking Too Late
- 🍄 Fungal rot: Overripe melons split and develop mold, spreading to nearby plants.
- 🐛 Pest magnets: Soft, ripe melons attract squash bugs and vine borers.
- 🌡️ Heat damage: Melons left in scorching sun lose sweetness and texture.
Pro Tip: Harvest within 2-3 days of full ripeness to avoid these risks.
One of the most common mistakes is judging ripeness by the vine’s color. While a yellowing vine can signal maturity, it’s not foolproof—some varieties stay green until harvest. Instead, focus on the tendril nearest the fruit.
When it turns brown and crispy, that’s your best clue. Pair this with the field-spotting trick: look for a creamy yellow patch where the melon rests on the ground.
Weather plays a sneaky role too. In humid climates, watermelons may ripen slower and develop uneven color. Meanwhile, drought stress can trick you into picking early by making the rind harder than usual.
Always check multiple signs—like the hollow-sounding thump test—before cutting the vine. Skipping this step often means wasting a perfectly good melon.
Another pitfall? Assuming all watermelons on one vine ripen together. In my garden, I’ve seen a single vine produce melons that ripen 10 days apart.
To avoid this, harvest each melon individually once it meets all ripeness criteria. Leaving one behind risks cross-contamination of pests or nutrient competition that stunts the others.
Finally, don’t ignore the underside of the melon. A white or yellow patch where it touches the soil is a classic sign of ripeness—but only if paired with other cues.
If the patch is gray or moldy, the melon’s been sitting too long and may be past its prime. When in doubt, cut one open (sacrificially!) to check the seed color—dark seeds mean it’s ready.