
How To
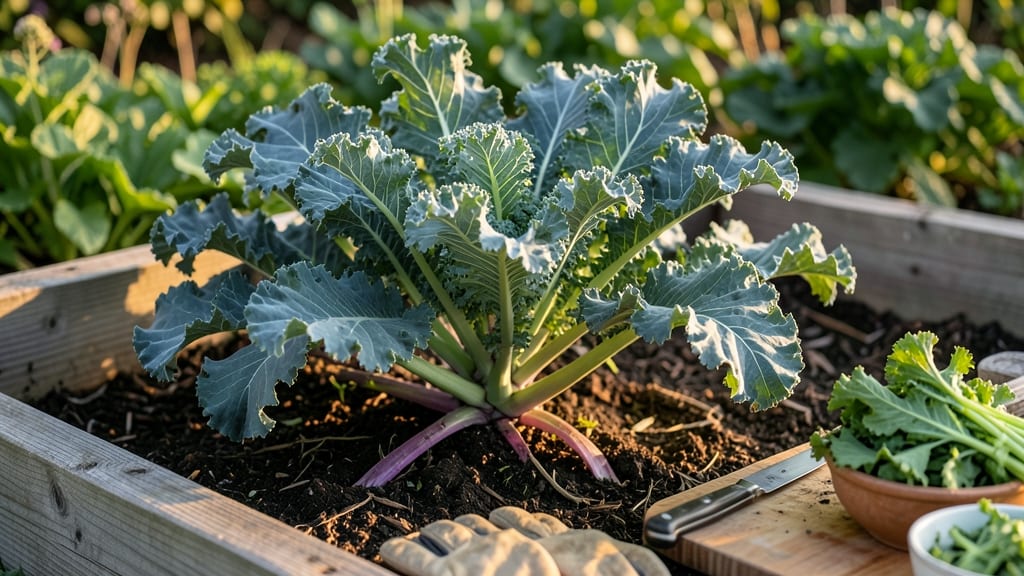
To pick kale from your garden at its peak flavor, focus on leaf size, firmness, and vibrant color—these are the key signs it’s ready for harvest.
Harvesting kale at the right moment ensures tender leaves packed with flavor—yet many gardeners miss the window, ending up with bitter or tough greens. Here’s how to time your harvest perfectly for the most delicious, nutrient-rich 🥬.
You don’t need fancy tools to harvest kale—just a sharp pair of scissors or clean pruners. The trick is cutting the right leaves while leaving enough growth to keep your plants producing.
Below, I’ll walk you through the exact steps to harvest kale, how to tell when it’s ready, and the best practices to keep your plants thriving for weeks of fresh greens.


5 Visual and textural signs your kale is ready for harvest
Knowing exactly when to harvest your kale can transform your garden bounty from tough and bitter to tender and sweet. The key lies in recognizing subtle visual and textural cues that signal peak ripeness.
Unlike many vegetables, kale rewards patience—harvesting too early means missing out on flavor, while waiting too long results in fibrous leaves. Let’s explore the five unmistakable signs that your kale is begging to be picked.
First, pay attention to the leaf size. Mature kale leaves typically reach 6 to 8 inches in length, depending on the variety. If your leaves are still small and delicate, they’re not ready—think of them as baby greens rather than full-flavored kale.
The ideal leaf should be large enough to hold its shape when gently cupped in your hand, but not so old that it’s starting to yellow or curl at the edges.
📌 Numbered Highlights: How to Pick Kale at Peak Ripeness
- 1. Leaf Size: Harvest when leaves reach 6-8 inches—large enough to hold shape but not wilted.
- 2. Stem Firmness: Press gently; stems should feel thick and sturdy, not hollow or brittle.
- 3. Color Depth: Look for vibrant, consistent hues (dark green, purple, or red), not pale or yellowing edges.
- 4. Leaf Texture: Leaves should be crisp with slight resistance—avoid limp or overly soft leaves.
- 5. Growth Stage: Outer leaves mature first; harvest them to encourage regrowth in the center.
💡 Pro Tip: Use clean, sharp pruning shears or a knife to cut leaves 1 inch above the stem for cleaner regrowth.
The stem firmness is another critical indicator. Run your thumb along the stem—it should feel thick and sturdy, almost like a small finger pressing into a firm cushion. If the stem feels hollow or brittle, your kale has passed its prime.
This is especially true for varieties like Lacinato (Dinosaur kale) or Red Russian, where thick stems correlate with robust flavor and texture.
Next, examine the color gradients of your kale leaves. Vibrant, deep green, purple, or red hues are a surefire sign of ripeness. If the leaves are pale, yellowing, or developing brown spots, they’re either underripe or stressed.
For example, Curly kale should have tight, glossy curls in rich green, while Oakleaf kale will showcase deep, wavy edges. A dull or uneven color means it’s time to harvest before the leaves deteriorate.
Don’t overlook the leaf texture, which is a dead giveaway for readiness. At peak ripeness, kale leaves should feel crisp with slight resistance when you gently squeeze them. If they’re limp, overly soft, or feel mushy, they’ve been left too long on the plant.
Conversely, if the leaves are still tender and easily bendable, they need more time to develop their signature crunch and sweetness.
Finally, consider the growth stage of your kale plant. Kale is a cut-and-come-again crop, meaning you can harvest outer leaves while leaving the inner ones to regrow. Start harvesting the outermost, largest leaves first, cutting them about 1 inch above the stem.
This method encourages the plant to produce more leaves, extending your harvest season. If you wait until the entire plant looks mature, you risk bolting—when the plant sends up a flower stalk and becomes bitter.
Timing your harvest based on these signs ensures you enjoy kale at its peak flavor and texture. Whether you’re growing Lacinato, Red Russian, or Curly kale, these visual and textural cues are your garden’s way of telling you it’s time to pick.
Grab your shears, head outside, and savor the reward of perfectly timed harvests!
Best harvesting techniques to preserve kale’s flavor and nutrition
Once your kale reaches peak ripeness, proper harvesting techniques make all the difference in maintaining its crisp texture and nutrient density. The way you cut and handle kale post-harvest directly impacts its shelf life and flavor.
I’ve learned that even a slight misstep—like using dull tools or improper storage—can turn your vibrant greens into wilted disappointment within days.
Timing is everything when harvesting kale. The ideal harvest window occurs when leaves reach 6-8 inches long and display deep, vibrant colors. If you wait too long, kale becomes tough and bitter, while harvesting too early means sacrificing flavor and yield.
Let’s break down the exact steps to ensure your kale stays fresh and delicious for weeks.
-
Step 1: Choose the Right Tools
Use sharp pruning shears or a clean kitchen knife to avoid crushing stems. Dull tools cause bruising, which accelerates spoilage.
-
Step 2: Harvest Outer Leaves First
Cut leaves from the outer edges of the plant, leaving the inner leaves to continue growing. This encourages regrowth and extends your harvest season.
-
Step 3: Cut at the Base
Sever leaves 1-2 inches above the stem to promote new growth. Avoid tearing leaves, as this damages the plant and reduces future yield.
-
Step 4: Handle Gently
Place harvested kale in a shallow container or basket to prevent bruising. Avoid stacking leaves, as this traps moisture and speeds up decay.
-
Step 5: Store Properly
Refrigerate kale in a perforated plastic bag or wrap loosely in a damp paper towel. Store in the crispest part of your fridge (usually the bottom drawer) to maintain freshness for up to 10 days.
After harvesting, I always rinse my kale just before use to remove dirt and pests, but never soak it—excess moisture leads to slimy leaves. For long-term storage, consider freezing kale by blanching leaves for 2 minutes before shocking in ice water.
This preserves nutrients and extends shelf life to 6 months in your freezer.
One common mistake I see is harvesting entire kale plants at once. Instead, focus on selective leaf harvesting to keep your plants productive. This method works especially well for curly kale and lacinto varieties, which regrow beautifully when treated gently.
Even in hotter months, kale thrives with consistent care and proper harvesting techniques.
For gardeners in USDA Zone 6a, aim to harvest kale between late spring and early fall, avoiding the harshest summer heat or deep freezes. If a frost is forecasted, harvest all remaining leaves before temperatures drop below 20°F, as frost turns kale mushy and unappetizing.
With these techniques, you’ll enjoy a steady supply of nutrient-packed kale all season long.