
Planting
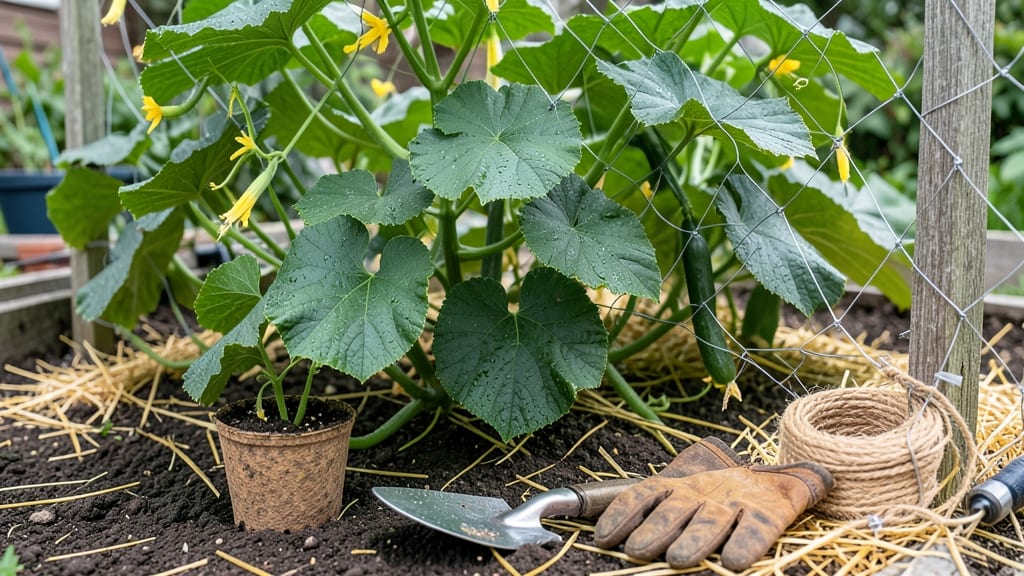
Planting cucumbers in a garden the right way means bigger yields, fewer pests, and a harvest that lasts from July through September.
You’ve probably seen those sprawling vines in farmers’ markets and wondered how to turn your own backyard into a cucumber powerhouse. The secret isn’t just in the seeds—it’s in the spacing, the trellis, and the soil prep that keeps your plants thriving.
Skip these steps, and you’ll end up with tangled vines and bitter fruit.
Whether you’re working with bush varieties or sprawling climbers, this guide breaks down the exact spacing, trellis hacks, and soil tricks that make all the difference. We’ll also cover the most common mistakes (like overcrowding) and how to fix them before they derail your harvest.
By the end, you’ll know how to plant cucumbers for a high-yield garden—no green thumb required. Let’s get those seeds in the ground the right way.

Step-by-step guide to planting cucumbers for maximum yield
Cucumbers thrive when planted with care, and the difference between a modest harvest and a bountiful yield often comes down to proper technique. Whether you're starting with seeds or transplants, the foundation begins with rich soil and the right timing.
Let’s break down the essential steps to set your cucumbers up for success from day one.
First, cucumbers love warm soil and air temperatures—they won’t germinate well in cold conditions. In cooler climates like USDA Zone 6a, wait until after the last frost (typically mid-April to early May) to plant.
If you’re in a warmer region, you can start as early as March, but always ensure nighttime temperatures stay above 50°F (10°C).
Before planting, prepare your soil by amending it with compost or aged manure to boost nutrients. Cucumbers are heavy feeders, so well-draining, fertile soil is critical. Aim for a pH between 6.0 and 6.8, which you can test with a simple soil kit.
If your soil is too acidic, add lime; if it’s alkaline, mix in sulfur.
Now, let’s dive into the planting process with a clear, step-by-step approach to ensure your cucumbers get off to a strong start.
How to Plant Cucumbers in a Garden
-
1. Choose Your Planting Method
Decide between direct-seeding or using transplants. Seeds are cheaper but slower to mature (55-70 days), while transplants give you a head start (45-55 days). -
2. Prepare Planting Holes
Dig holes 1 inch deep for seeds or slightly deeper for transplants. Space holes 3-4 feet apart for vining varieties or 2-3 feet apart for bush types. -
3. Plant Seeds or Transplants
Drop 2-3 seeds per hole (you’ll thin to the strongest seedling later) or place a transplant gently into the hole. Cover seeds with soil and pat lightly. -
4. Water Immediately
Give the soil a deep watering (1-2 inches) to settle it and encourage germination. Keep soil consistently moist but not soggy—aim for 1 inch of water per week. -
5. Thin Seedlings (If Direct-Seeded)
Once seedlings are 2-3 inches tall, snip the weaker ones at the base, leaving the strongest plant per hole. This reduces competition for nutrients. -
6. Add Mulch
Spread 2-3 inches of mulch (straw or shredded leaves) around the base to retain moisture, suppress weeds, and keep fruit clean off the soil. -
7. Install Trellis (Optional but Recommended)
For vining varieties, set up a trellis or cage early to encourage upward growth. This improves air circulation, reduces disease risk, and makes harvesting easier.
After planting, monitor your cucumbers closely for the first 2-3 weeks as they establish roots. Seedlings need consistent moisture but can suffer from overwatering, which leads to root rot.
Water at the base of the plant in the morning to allow foliage to dry quickly and prevent fungal issues like powdery mildew.
In warmer climates, you can extend your growing season by planting successive crops every 2-3 weeks until early July. This staggered approach ensures a steady supply of fresh cucumbers throughout the summer. Just remember, cucumbers are annuals, so they’ll need to be replanted each year.
For cooler regions, consider using black plastic mulch to warm the soil faster in spring. This simple trick can shave weeks off your growing season and give your cucumbers the head start they need. Pair it with a row cover for extra protection if frost threatens.
Finally, keep an eye out for pests like cucumber beetles and diseases such as downy mildew. Healthy plants with proper spacing and good airflow are far less susceptible to these issues.
With these steps, you’ll be well on your way to a thriving cucumber patch and a harvest that rivals the grocery store—without the cost or pesticides!
Optimal cucumber plant spacing and trellis systems for bigger harvests
Proper cucumber plant spacing and trellis systems can triple your harvest by improving air circulation and reducing disease. Most gardeners overlook these details, but science-backed spacing is key to maximizing fruit production. Whether you're growing bush varieties or vining types, the right setup makes all the difference.
Cucumbers thrive when given enough room to spread—crowded plants lead to poor airflow, increasing the risk of powdery mildew and other fungal diseases. A well-designed trellis system also helps direct vine growth upward, saving space and making harvests easier.
Let’s break down the best practices for both spacing and support structures.
| Variety Type | Spacing (Feet) | Trellis Type | DIY Materials |
|---|---|---|---|
| Bush Varieties | 1.5–2 ft apart | Low wire or stakes (2–3 ft tall) | Bamboo stakes, chicken wire |
| Vining Varieties | 3–6 ft apart | Vertical trellis (6–10 ft tall) | PVC pipes, wooden lattice, A-frame |
| Compact Vining | 2–3 ft apart | Horizontal trellis (3–4 ft tall) | String grid, wire mesh |
For bush cucumbers, keep plants 1.5–2 feet apart in rows spaced 3 feet apart. These compact varieties don’t need tall trellises—just low supports (2–3 feet tall) to keep fruit off the ground. Use bamboo stakes or chicken wire for a simple DIY solution.
If you’re growing vining cucumbers, allocate 3–6 feet of space per plant to prevent overcrowding. Install a vertical trellis (6–10 feet tall) to guide vines upward, saving garden space and improving airflow.
For DIY trellises, try PVC pipes or a wooden lattice—both are sturdy and easy to assemble.
Horizontal trellises work well for compact vining varieties, like ‘Spacemaster’ or ‘Sweet Success’. String a grid of wire or twine at 3–4 feet high to support vines while keeping fruit accessible.
This method is perfect for small gardens or containers, as it maximizes vertical growth without taking up extra ground space.
Regardless of your trellis choice, always train vines gently to avoid damaging stems. Use soft ties or twine to secure vines to supports, and prune excess side shoots to focus energy on fruit production. Proper spacing and support ensure healthier plants and a bigger, cleaner harvest all season long.