
Picking
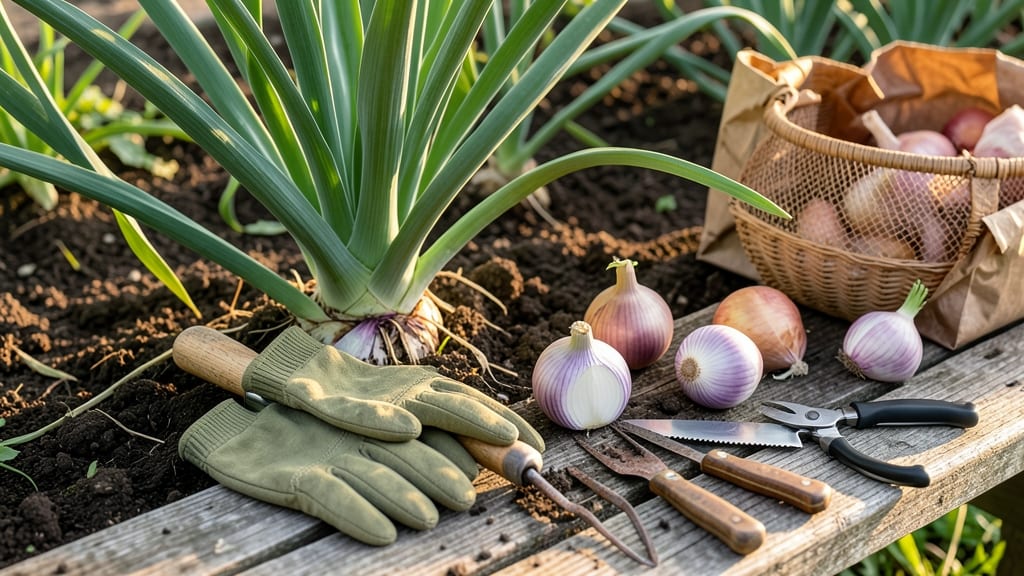
Picking onions from your garden at the right time ensures bulbs that are flavorful, store well, and don’t split—so timing is everything.
Harvest too early, and you’ll get small, pungent onions with poor storage life. Wait too long, and you risk splitting bulbs or even losing the whole crop to rot.
The difference between a perfect harvest and a wasted effort often comes down to watching for just three key visual cues.
Most gardeners plant onions in spring or fall, but the harvest window shifts depending on your USDA Zone 6a climate. Spring-planted onions typically reach peak ripeness in June or July, while fall varieties mature later, around October or November.
Knowing when to pull them isn’t just about the calendar—it’s about reading the plant’s signals.
In this guide, you’ll learn how to spot the ideal moment to harvest your 🧅 onions, from bulb size and neck shrinkage to leaf color changes. Plus, I’ll share my top tips for curing and storing them so they last all winter.


3 Visual cues to determine when onions are ready for harvest
Knowing exactly when to harvest onions can mean the difference between sweet, flavorful bulbs and bitter, shriveled ones. Many gardeners make the mistake of waiting too long, only to find their onions have split or gone to seed.
The key is watching for these three visual cues that signal your onions are ready to pull. These signs work for both spring-planted and fall-planted varieties, so you can apply them year-round.
First, let’s clarify what you’re looking for: onions mature when their foliage changes color, their bulbs reach ideal size, and their necks begin to shrink. These three factors work together to tell you it’s time to harvest.
Ignoring even one can lead to onions that store poorly or lack flavor. For example, pulling onions too early means small bulbs, while waiting too long results in split skins and wasted effort.
Here’s the game-changer: these visual cues are universal across onion varieties, whether you’re growing yellow, red, or white onions. The only exception is green onions, which you harvest differently by cutting the stems when they reach 6-8 inches tall.
For bulbing onions, focus on these three telltale signs to ensure a perfect harvest every time.
-
1Tops Yellow and Fall Over
The most obvious sign is when the green tops turn yellow and flop over. This indicates the bulb has stopped growing upward and is ready for harvest. If you see brown or wilted tops, it’s a clear signal to act quickly. -
2Bulb Diameter Reaches 1-2 Inches
Gently dig around the base of the plant to check the bulb size. Ideal onions should be 1-2 inches in diameter. Smaller bulbs (under 1 inch) won’t store well, while larger ones risk splitting. Use your fingers to feel for firmness—soft bulbs are still growing. -
3Neck Shrinks and Papery Skin Forms
The neck of the bulb (where the green tops meet the bulb) will shrink and tighten. This is your final cue! Additionally, the bulb should develop a papery skin. If the neck is still thick and green, wait a few more days before harvesting.
Let’s talk about what happens if you miss these cues. Waiting too long after the tops yellow can cause the bulbs to split open, making them unusable. On the flip side, harvesting too early means small, underdeveloped bulbs that won’t store well.
For example, I once left my red onions in the ground for two extra weeks past the yellow-top stage, and half of them split open—heartbreaking after all that care!
Timing also depends on your climate and variety. In warmer regions, onions mature faster, so check them every 3-5 days once the tops start yellowing. In cooler areas, the process slows down, giving you a few extra days.
For instance, short-day onions (like Texas Early White) mature in about 100 days, while long-day onions (like Sweet Spanish) take closer to 120 days.
Pro tip: Harvest in the morning after the dew has dried but before the sun gets too hot. This reduces stress on the plant and helps the bulbs dry more evenly. Use a garden fork to gently loosen the soil around the onion, then lift it out carefully.
Avoid pulling by the tops—this can damage the bulb. Instead, grasp the base and twist gently to detach it from the roots.
One common mistake is confusing ready-to-harvest onions with those that are overripe. Overripe onions often have soft, mushy bulbs and a strong, pungent odor. If you see blackened or rotting spots on the bulb, it’s a sign of disease or overmaturity.
In this case, use the onion immediately rather than storing it. For storage, you’ll want to cure the onions first—more on that in our next section!
Remember, patience is key when harvesting onions. Rushing the process can lead to poor storage life, while waiting too long can ruin your entire crop. By mastering these three visual cues, you’ll consistently harvest onions at their peak flavor and quality.
Now that you know when to pull them, stay tuned for our next section on avoiding common harvesting mistakes that could turn your perfect crop into a disaster.
Onion harvesting mistakes that ruin your crop (and how to avoid them)
Even experienced gardeners sometimes make critical mistakes when harvesting onions, leading to wasted effort and poor-quality bulbs. Overlooking subtle signs like leaf color or bulb firmness can turn a bountiful crop into a disappointment.
I’ve seen entire harvests spoiled by simple timing errors, and I’m here to help you avoid them.
One of the biggest mistakes is waiting too long to harvest. When onions stay in the ground past their prime, they split open or develop soft, mushy centers. This ruins their storage potential and flavor.
On the flip side, pulling them too early results in small, pungent bulbs that lack the sweetness and storage life of properly matured onions.
Another common error is improper handling after harvest. Many gardeners skip the curing process, which is essential for preventing rot and extending shelf life. Without proper drying, onions won’t store well and may spoil within weeks instead of months.
Let’s dive into these mistakes—and how to fix them—so you can enjoy a perfect harvest every time.
⚠️ Critical Mistake: Harvesting at the Wrong Time
Problem: Onions left in the ground too long split open, while those pulled too early stay small and pungent. Solution: Harvest when 50-60% of tops yellow and fall over, and bulbs reach 1-2 inches in diameter. Use your fingers to gently squeeze the bulb—it should feel firm, not soft.
Visual Cue: Look for papery skin forming around the bulb’s neck. This indicates the onion is ready for harvest and will store well.
If you’re growing short-day onions (like Texas or Yellow Granex), timing is even more critical. These varieties need specific daylight conditions to mature properly.
Plant them in late summer for a fall harvest, and watch closely for the tops to yellow and dry—this is your cue to act quickly before the first frost.
Another avoidable mistake is using the wrong tools for harvesting. A sharp knife or garden fork is ideal for lifting onions cleanly without damaging the bulbs. Rough handling can bruise onions, making them more susceptible to rot.
Always cut the tops to about 1 inch above the bulb to prevent moisture loss during curing.
Finally, skipping the curing process is a surefire way to shorten your onions’ shelf life. After harvesting, lay onions in a dry, shady, and well-ventilated area for 2-3 weeks.
This step removes excess moisture and toughens the skin, allowing them to store for months. Without curing, onions may mold or spoil within weeks.
By avoiding these common mistakes—harvesting at the right time, using proper tools, and curing your onions correctly—you’ll enjoy a bountiful, flavorful harvest that lasts all season. Don’t let simple errors turn your hard work into wasted effort! 🧅✂️