
Picking
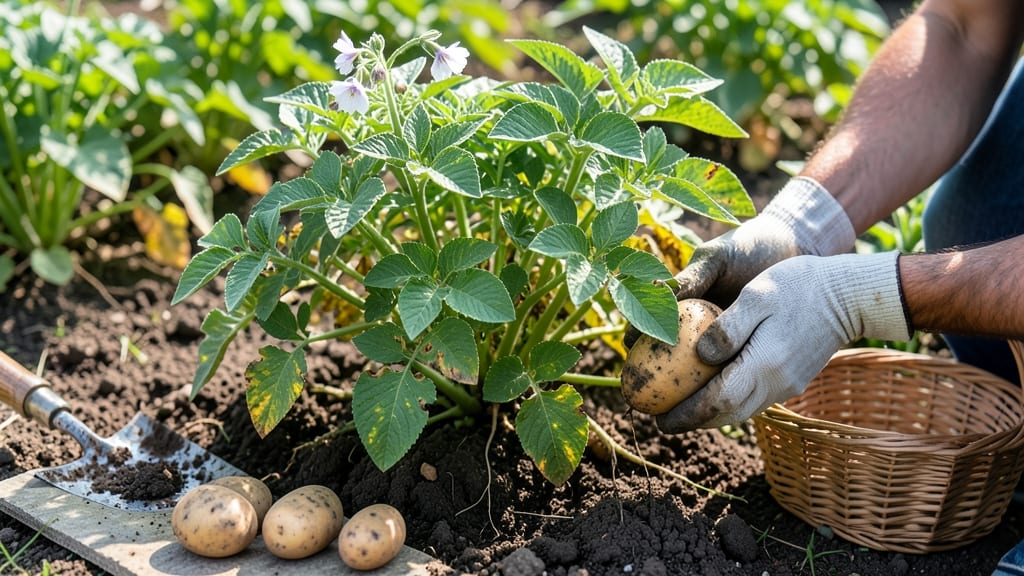
To pick potatoes from your garden at the perfect time means catching them when flavor peaks and skins toughen just enough to store—miss it, and you lose both taste and yield.
Picture this: you’ve spent weeks nurturing your 🥔 crop, only to dig up tubers that are either still green and waxy or shrunken and shriveled. The difference between a stellar harvest and a disappointing one often comes down to timing—something even experienced gardeners get wrong.
Below, I’ll walk you through the foolproof skin slip test, plus three other dead-giveaway signs that your potatoes are ready to pull. You’ll also learn how to adjust for early vs. late varieties and avoid the three biggest mistakes that turn a great harvest into a gamble.
By the end, you’ll know exactly when to grab your shovel—and why waiting just a little longer can mean the difference between a meal-worthy potato and one that’s barely edible.


The skin slip test: how to tell when potatoes are ready to harvest
Harvesting potatoes too early means tiny, underdeveloped tubers, while waiting too long risks splitting or rotting from frost. The skin slip test is my go-to method for pinpointing the perfect harvest window—it’s simple, science-backed, and works for every potato variety.
This test reveals whether your tubers have reached their ideal maturity by checking how easily the skin separates from the flesh, a clear sign of starch development and flavor readiness.
Why does this test work? Potatoes produce solanine, a natural toxin that protects tubers from pests. As they mature, the skin thickens and the flesh dries slightly, making the skin slip more easily—a sign the solanine levels are safe and the starch content is optimal.
Early potatoes often fail this test because their skin is still tightly bound to the flesh, while overripe tubers may pass the test but risk splitting or developing a harsh taste.
Before you dig, gather these tools: a small hand fork, a glove (to protect your hands), and a bucket of straw or burlap to cushion freshly dug potatoes. Work on a dry day when the soil is slightly firm—this prevents tubers from bruising.
The skin slip test takes just seconds per tuber, so you’ll know exactly when to stop digging and start celebrating your harvest.
-
Step 1: Choose a healthy plant
Select a plant with vigorous foliage and no signs of disease. Avoid plants showing yellowing leaves or wilting—these may indicate stress or disease, not maturity. -
Step 2: Dig carefully
Use a hand fork to loosen soil around the base of the plant. Gently lift the plant to expose the tubers. Avoid using a shovel, which can damage nearby tubers. -
Step 3: Select a tuber
Pick a medium-sized tuber (about the size of a golf ball). Avoid the largest or smallest tubers for testing—they may not be representative of the crop. -
Step 4: Perform the slip test
Hold the tuber firmly and try to slide the skin away from the flesh using your thumb. If the skin slips off easily with gentle pressure, the potatoes are ready to harvest. -
Step 5: Interpret the results
Skin slips easily = Harvest now for peak flavor.
Skin resists or tears = Wait 1-2 weeks and retest.
Skin is green or tough = Tubers are underdeveloped; wait longer. -
Step 6: Adjust for variety
Early varieties (e.g., 'Red Pontiac') may pass the test in 70-80 days.
Storage varieties (e.g., 'Russet Burbank') often need 90-120 days to reach ideal maturity.
False positives can happen if you test too early in the morning when tubers are still cool and firm. Always perform the test in the late afternoon when tubers have warmed slightly from the sun.
Similarly, if your soil is extremely dry, the skin may slip prematurely due to dehydration—water the plants thoroughly 24 hours before testing for accurate results.
For new potatoes, you can harvest as soon as they pass the skin slip test, even if they’re small. These are perfect for boiling or roasting and won’t store long-term. However, if you’re growing storage potatoes, wait until most tubers slip easily before digging.
This ensures maximum yield and longer storage life—aim for tubers the size of a baseball or larger for best results.
Regional adjustments are key: In short-season climates (USDA Zones 1-4), perform the test as soon as foliage starts yellowing, even if tubers aren’t fully sized. In longer growing seasons (Zones 7-10), you can afford to wait until tubers are larger and the skin is thicker.
Always dig a few test tubers before committing to a full harvest to avoid over-maturing your crop.
Pro tip: If you’re growing multiple varieties, test each one separately—they mature at different rates. For example, 'Yukon Gold' often passes the test earlier than 'Kennebec'. Keep a harvest journal to track when each variety reaches maturity, so you can plan future plantings more effectively.
Once your potatoes pass the skin slip test, harvest on a dry, sunny day to allow tubers to cure for 24 hours before storing. Cure them in a dark, well-ventilated space at 50-60°F to develop thicker skins, which improves storage life.
Avoid washing tubers until you’re ready to use them—moisture speeds up spoilage.
🌱
3 Clear signs your potatoes are perfectly ripe (beyond the skin test)
If you've ever dug up potatoes only to find them small, green, or still hard, you know timing is everything. The skin slip test is a classic method, but these three visual and tactile signs will give you confidence in your harvest—no guessing required.
From leaf color shifts to soil temperature cues, these indicators work for both new potatoes and storage varieties, even in short growing seasons.
I've learned the hard way that waiting too long can lead to sprouted tubers or shrunken potatoes, while harvesting too early means underdeveloped flavor. The key is understanding how your potato variety and local climate interact.
For example, Yukon Golds mature faster in warm soil, while Russets need cooler temperatures to reach peak starch levels. Let's break down the three foolproof signs that your potatoes are ready to harvest.
🌱 3 Signs Your Potatoes Are Perfectly Ripe
- 1 Leaf Yellowing & Dieback: When 70-80% of foliage turns yellow and wilts (but doesn't rot), tubers are ready. Russet varieties may take longer—wait until stems snap easily when bent.
-
2
Tuber Size by Variety: Dig a test tuber when:
- New potatoes: 1-2 inches (harvest early for tender flavor)
- Yukon Gold: 2-3 inches (buttery texture)
- Russet: 3-4 inches (thick skin for storage)
- 3 Soil Temperature: Harvest when soil drops to 60-70°F (ideal for starch development). In short seasons, use black plastic mulch to warm soil early—this speeds up maturity by 10-14 days.
Pro Tip: For regional adjustments, add 2-3 weeks to harvest times in cool climates (e.g., Pacific Northwest) and subtract 1-2 weeks in hot zones (e.g., Southern California).
Don't overlook the hidden role of soil temperature—it's the secret weapon for gardeners in short-season zones. I once grew Red Pontiac potatoes in Zone 4, and by monitoring soil temps with a cheap digital probe, I harvested a week earlier than neighbors.
When soil hits 60°F, tubers stop growing and maximize starch content, which is crucial for storage varieties.
For leaf yellowing patterns, focus on the older leaves first—they'll brown and crisp while younger leaves stay green. This is your plant's way of redirecting energy to the underground tubers.
If you see green stems still standing, wait 5-7 more days. And if your potato plants suddenly wilt in hot weather, it might be blight, not ripeness—dig immediately to salvage tubers.
One common mistake is assuming all potatoes ripen at once. Early varieties like 'Early Girl' mature in 60-70 days, while late varieties like 'Kennebec' need 100+ days.
To avoid missing the window, plant a mix of varieties spaced 2-3 weeks apart. This way, you get a staggered harvest and can enjoy fresh potatoes all summer.
Finally, remember that regional adjustments matter more than you think. In Zone 5 or cooler, aim to harvest before the first frost—even if tubers aren't fully mature.
For longer growing seasons (Zones 7-10), you can push harvest times later, but watch for soil-borne diseases that thrive in warm, wet conditions. When in doubt, dig a test tuber—it's the only way to be absolutely sure.